Electronic Signing
Core Functions
Certificate Enrollment
User Journey
Steps
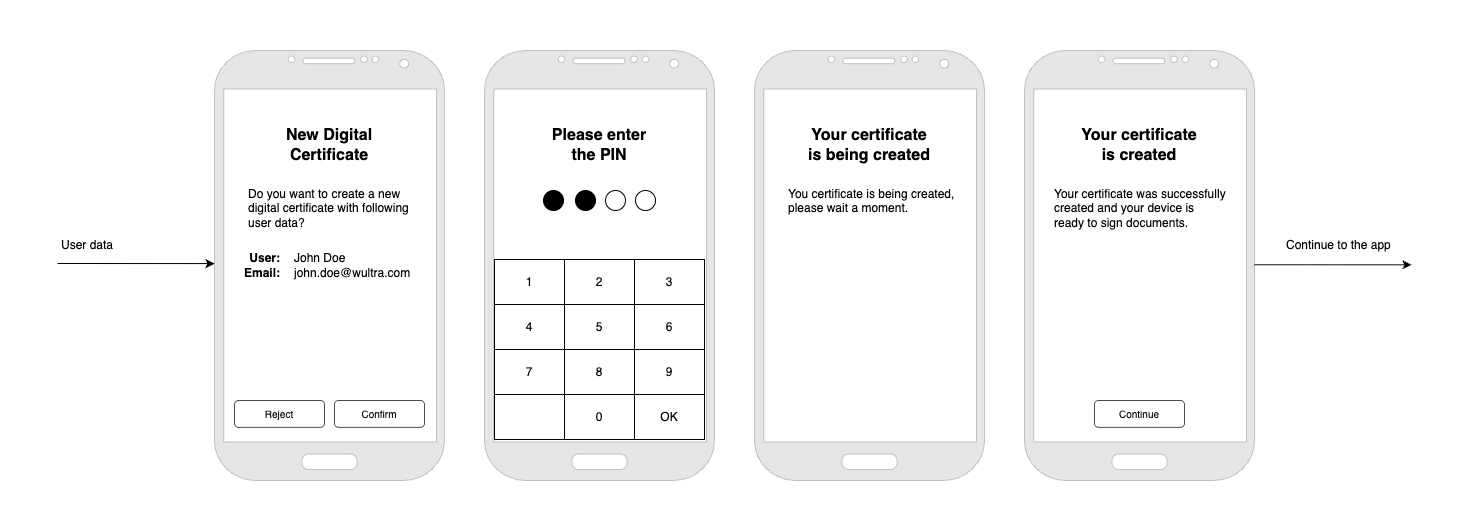
- Start enrollment process and include User Data (it will be included in the certificate). You can start your process right after the activation or later, for example on user’s request.
- User enters the PIN so app can sign certificate request with device’s private key. In this step, so called CSR file is created. Read more about CSR here.
- CSR is passed to the Signer Cloud and certificate is generated. Process should be quick, so this screen is not strictly necessary.
- Certificate is created and user is ready to sign documents. Continue to the app or target user directly into your custom flow.
NOTE: If enrollment is placed right after device activation, PIN confirmation from activation can be used. In this case, Step 2 can be omitted.
Integration
Steps
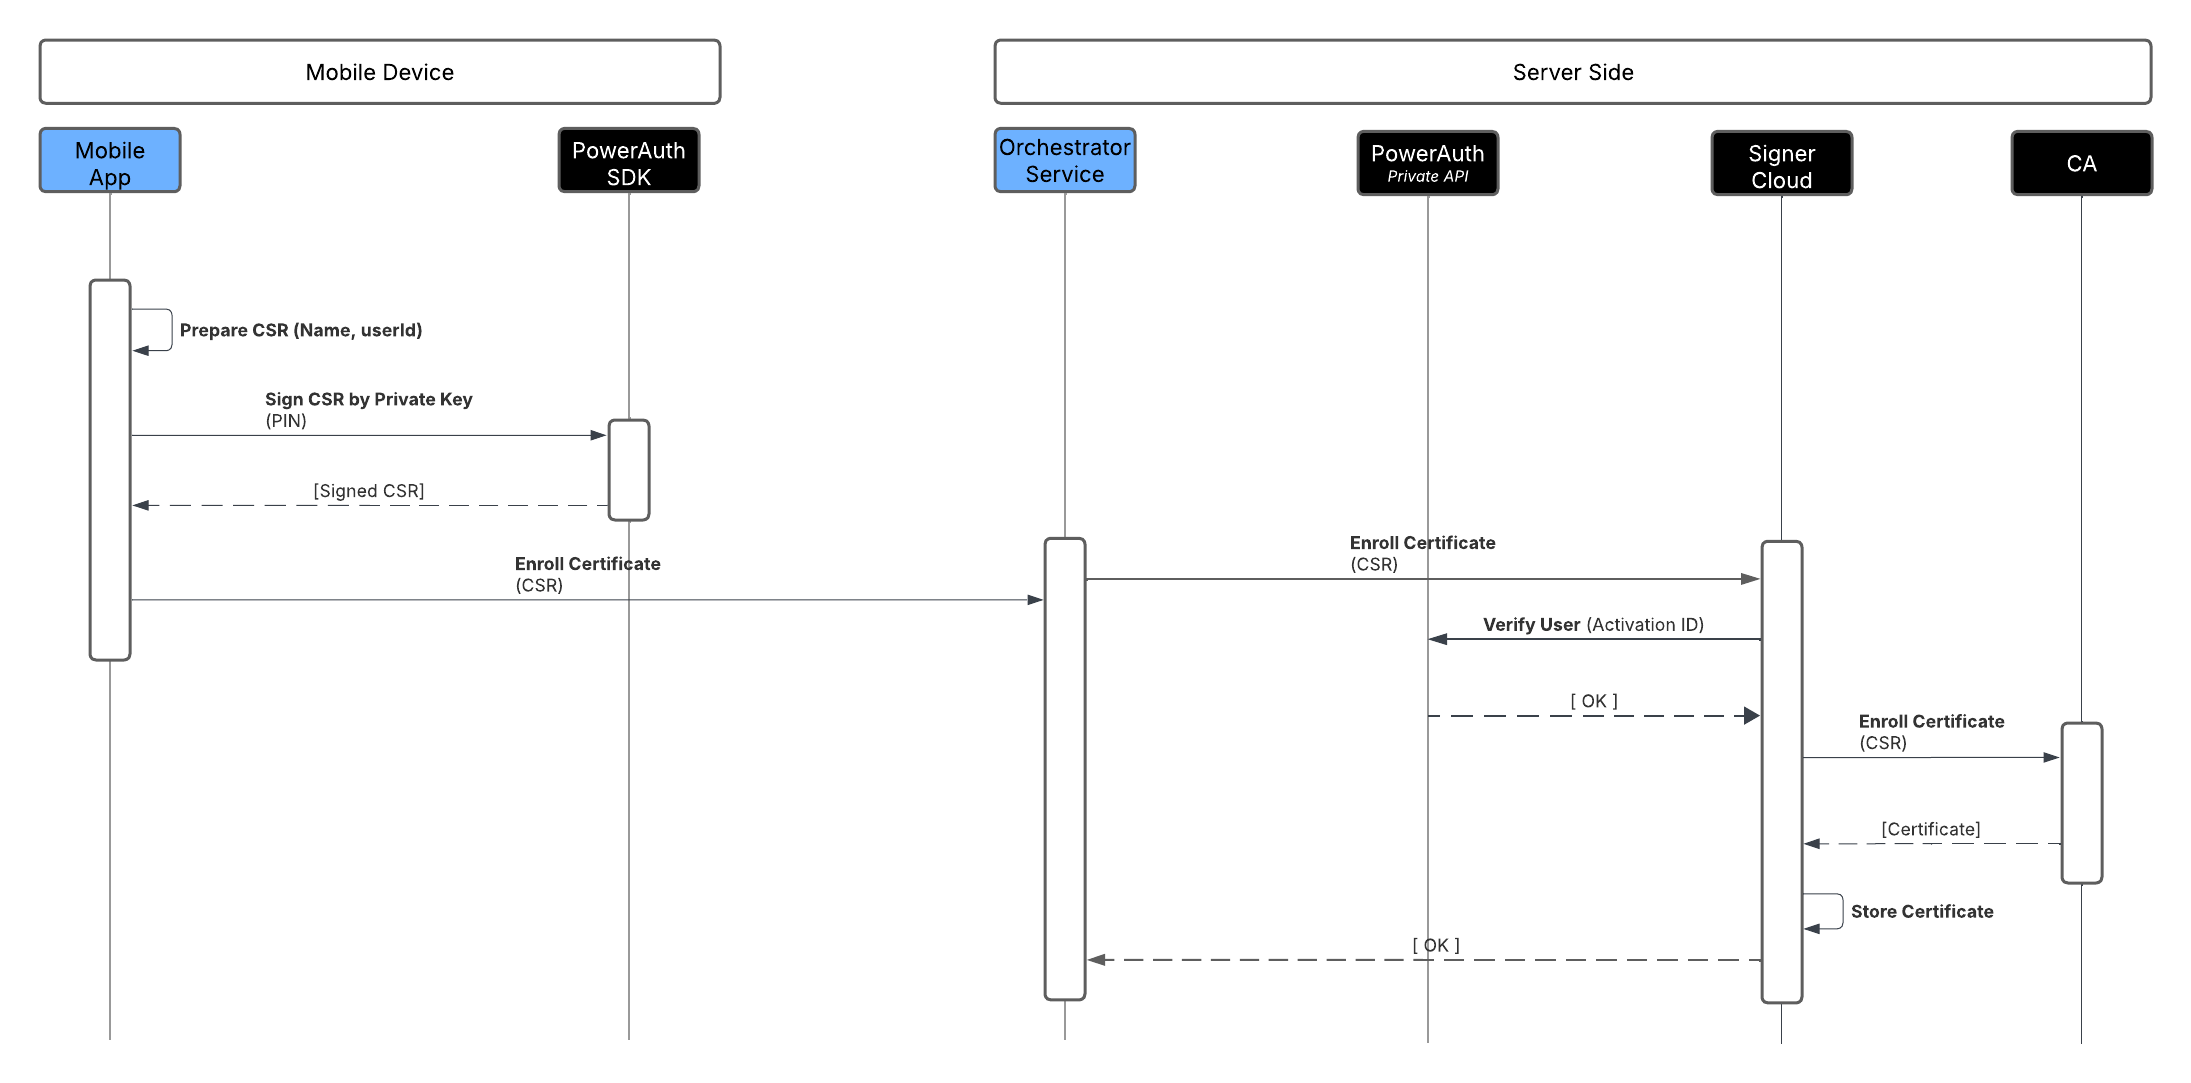
- Prepare the CSR on the mobile device. User data is required, so an external call to the Orchestrator Service may be necessary.
- Sign the CSR using the PowerAuth SDK on the mobile device.
- Send the result to the Orchestrator Service (the bank’s service that manages business logic).
- The Orchestrator Service passes the signed CSR to the Signer Cloud via the REST API.
- The Signer Cloud will verify the user against PowerAuth, generate the certificate via the CA, and store the certificate for signing. The result is returned immediately.
Document Signing
The signing process involves adding a digital signature to a file. The certificate generated during the enrollment phase is part of this process and will be included in the file.
The solution accepts a PDF file as an input and produces a new PDF with a signature. Although it can only sign one document at a time, you can create a queue to sign multiple documents in the background.
User Journey
One document
Multiple documents
Steps
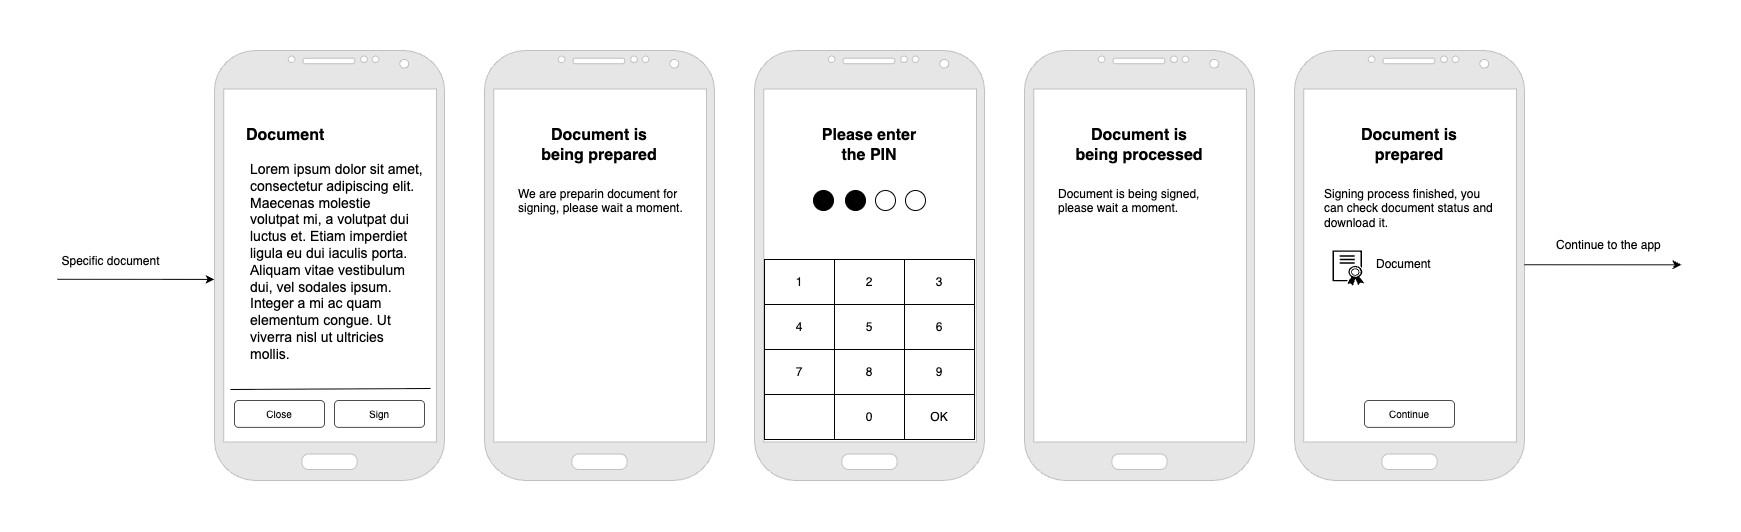
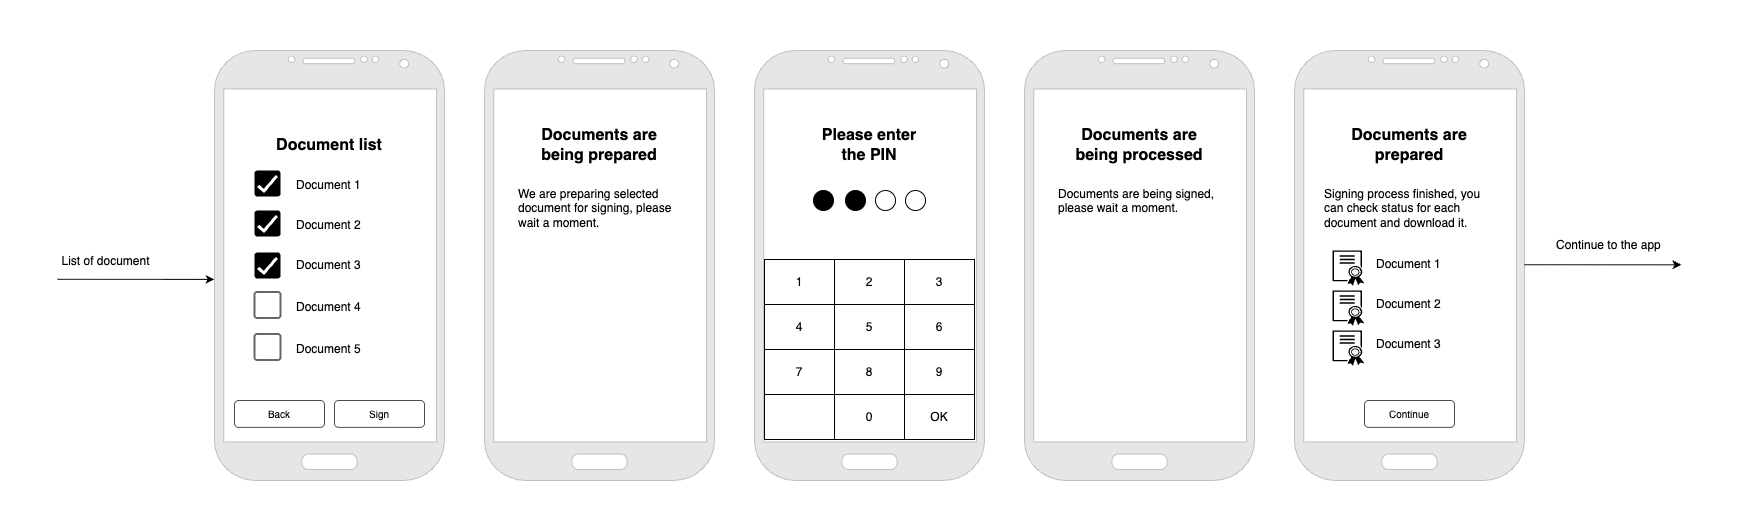
- This step is completely on the application. In general, user should be able to read the document and select what he wants to sign. For example, you can also allow signing only if the user opened/read the file.
- After the confirmation, you need to send PDF files to the Signer Cloud. It stores the file and calculates hash.
- User enters the PIN so app can sign document hash generated in the previous step.
- Document hash is checked and if everything is OK, we will include user’s certificate into the document stored in step 2.
- Result is presented to the user so he can download signed document.
Integration
Steps
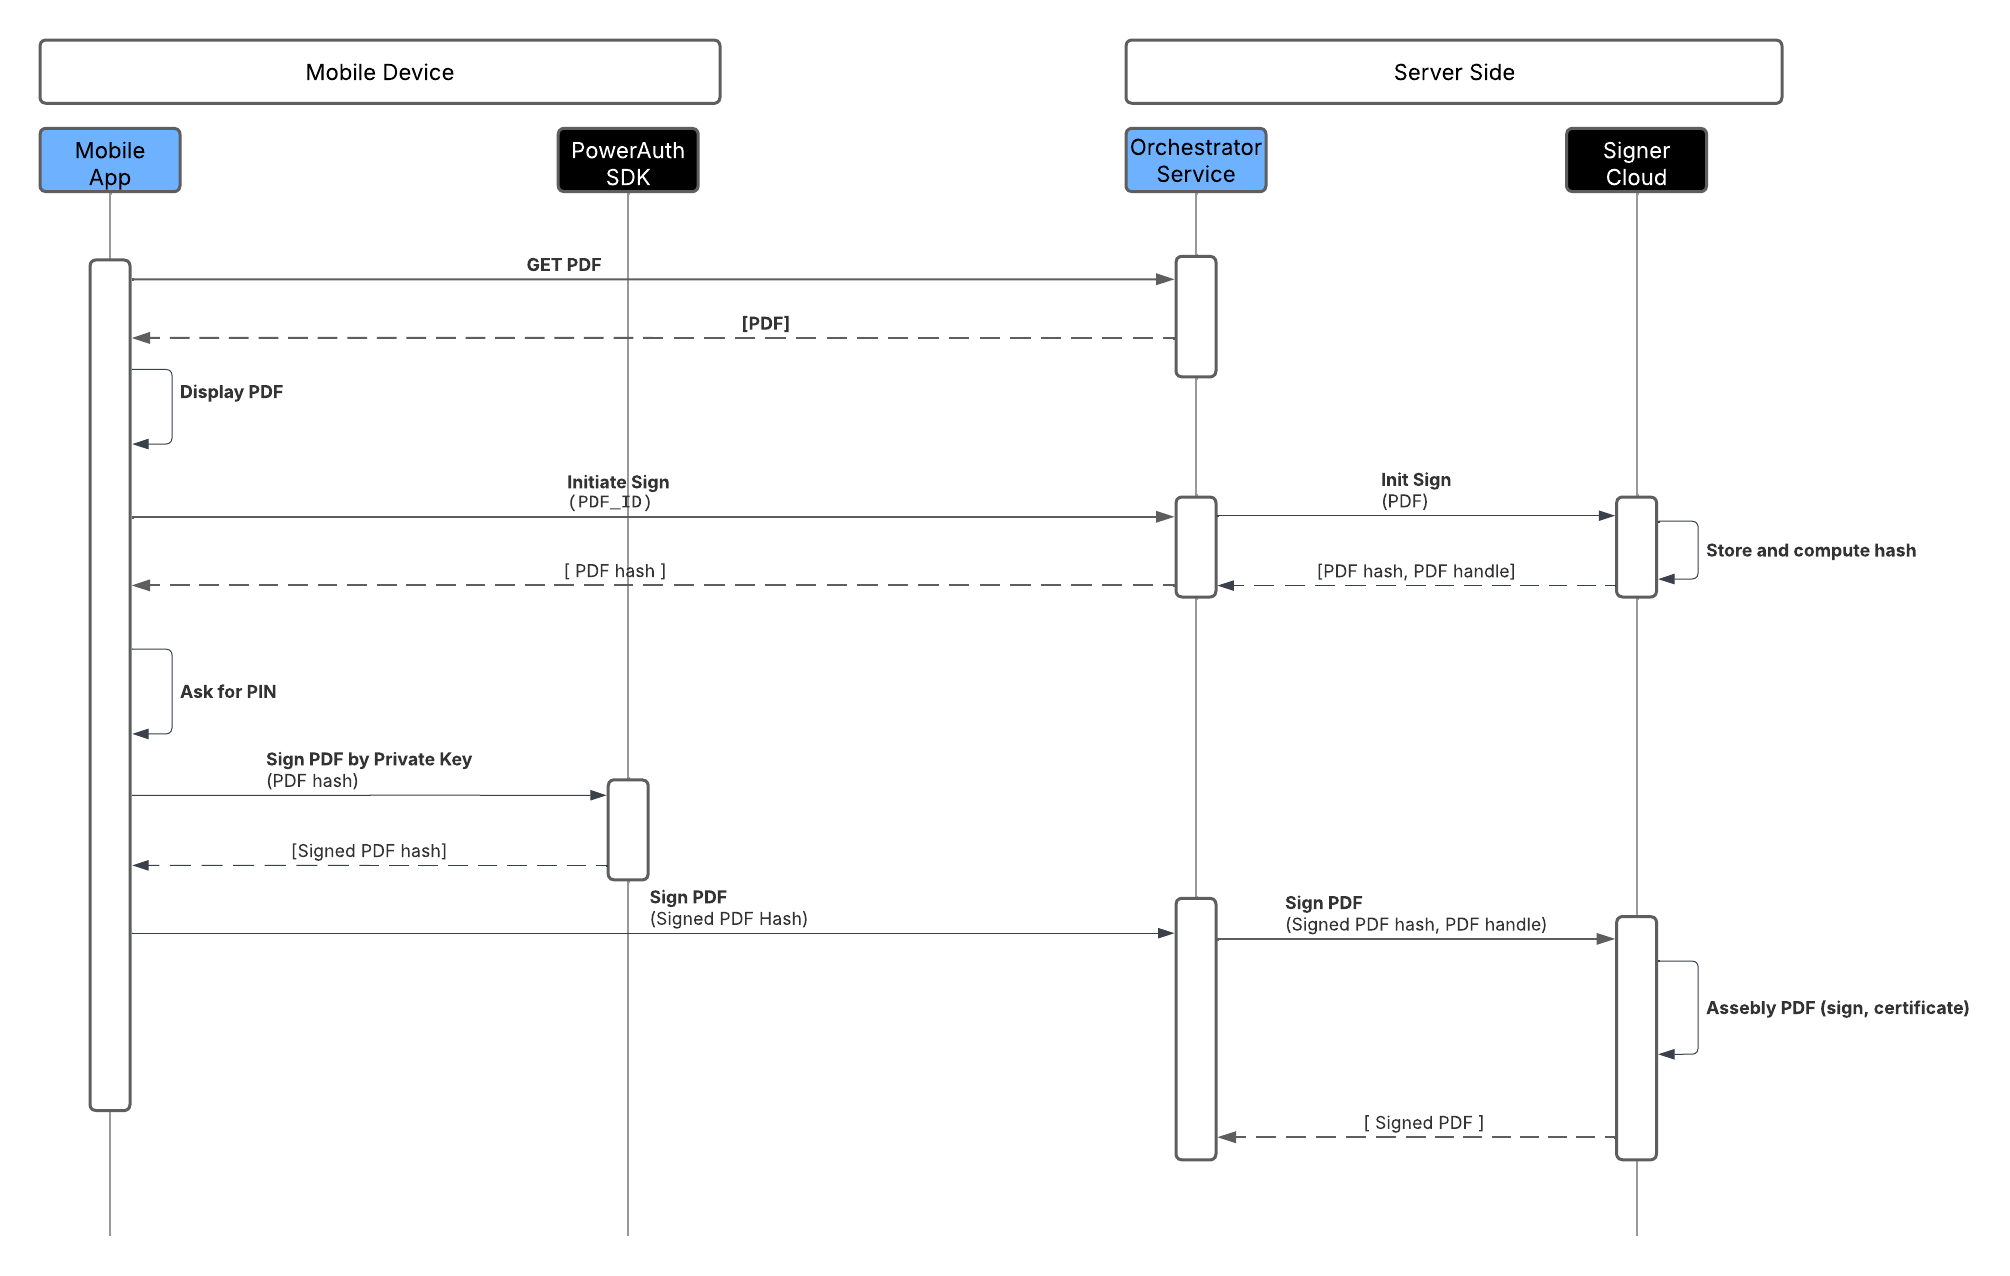
- Present the document to the user. It needs to be downloaded from the bank’s storage, and then let the user select which document should be signed. Then, pass the document (or document ID) from the mobile app to the orchestrator service.
- Send the document from the Orchestrator Service to Signer Cloud via the REST API method “Upload Document.” Signer Cloud will store the file and return its hash in the response.
- Use the PowerAuth SDK to sign the document hash on an activated mobile device.
- Send the result to the Orchestrator Service.
- Send the signed hash from the Orchestrator Service to Signer Cloud via the REST API. After signature verification, the document is complete and the result is returned immediately.