PowerAuth Mobile SDK for iOS Apps
Table of Contents
- Installation
- Post-Installation steps
- SDK Configuration
- Device Activation
- Requesting Device Activation Status
- Data Signing
- Password Change
- Biometry Setup
- Device Activation Removal
- End-To-End Encryption
- Secure Vault
- Token Based Authentication
- Apple Watch Support
- Common SDK Tasks
- Additional Features
Related documents:
Installation
This chapter describes how to get PowerAuth SDK for iOS up and running in your app. In current version, you can choose between CocoaPods and manual library integration.
CocoaPods
CocoaPods is a dependency manager for Cocoa projects. You can install it with the following command:
$ gem install cocoapods
To integrate PowerAuth library into your Xcode project using CocoaPods, specify it in your Podfile:
platform :ios, '8.0'
target '<Your Target App>' do
  pod 'PowerAuth2'
end

# Disable bitcode for iOS targets (also see chapter Disabling bitcode)
post_install do |installer|
  installer.pods_project.targets.each do |target|
    if target.platform_name == :ios
      puts "Disabling bitcode for target  #{target.name}"
      target.build_configurations.each do |config|
        config.build_settings['ENABLE_BITCODE'] = 'NO'
      end
    end
  end
end
Then, run the following command:
$ pod install
Manual
If you prefer not to use CocoaPods as dependency manager, you can integrate PowerAuth into your project manually as a git submodule.
Git submodules
- Open up Terminal.app and go to your top-level project directory and add the library as a submodule:
 $ git submodule add https://github.com/wultra/powerauth-mobile-sdk.git PowerAuthLib
 $ git submodule update --init --recursive
First command will clone PowerAuth SDK into
PowerAuthLibfolder and second, will update all nested submodules. - Open the new
PowerAuthLibfolder, and go toproj-xcodesub-folder - Drag the
PowerAuthLib.xcodeprojproject file into Project Navigator of your application’s Xcode project. It should appear nested underneath your application’s blue project icon. - Select your application project in the Project Navigator to navigate to the target configuration window and select the extension’s target under the TARGETS heading in the sidebar.
- Now select Build Phases tab and expand Target Dependencies section. Click on the “Plus Sign” and choose “PowerAuth2” framework from the “PowerAuthLib” project.
- Next, in the same Build Phases tab expand Link With Libraries section. Click on the “Plus Sign” and choose “PowerAuth2.framework” from the “PowerAuthLib” project.
Carthage
We provide a limited and experimental support for Carthage dependency manager. The current problem with Carthage is that we cannot specify which Xcode project and which Scheme has to be used for particular library build. It kind of works automatically, but the build process is extremely slow and not reliable. So, if you still want to try integrate our library with Carghate, try following tips:
- Add
github "wultra/powerauth-mobile-sdk" "feature/carthage-build"into yourCartfile. We’re maintaining separate branch for Carthage builds, so if it’s not up to date, please let us know. We’ll update that branch as soon as possible. - It’s recommended to force Carthage to use submodules for library code checkouts.
- It’s recommended to update only iOS platform (if possible). So try to run something like this:
carthage update --use-submodules --platform ios
Post-installation steps
Following steps are recommended for all types of installations.
Disabling Bitcode
When the Enable Bitcode option is set to YES, your application is build to LLVM IR (intermediate representation) rather than to the final executable binary. Later, the final binary is built in the Apple cloud for various architectures. As a result of this process, you are not in control of what actually goes in your binary. Any application with high security requirements cannot accept this proposition. As a result, PowerAuth SDK for iOS cannot be built with Enable Bitcode option enabled.
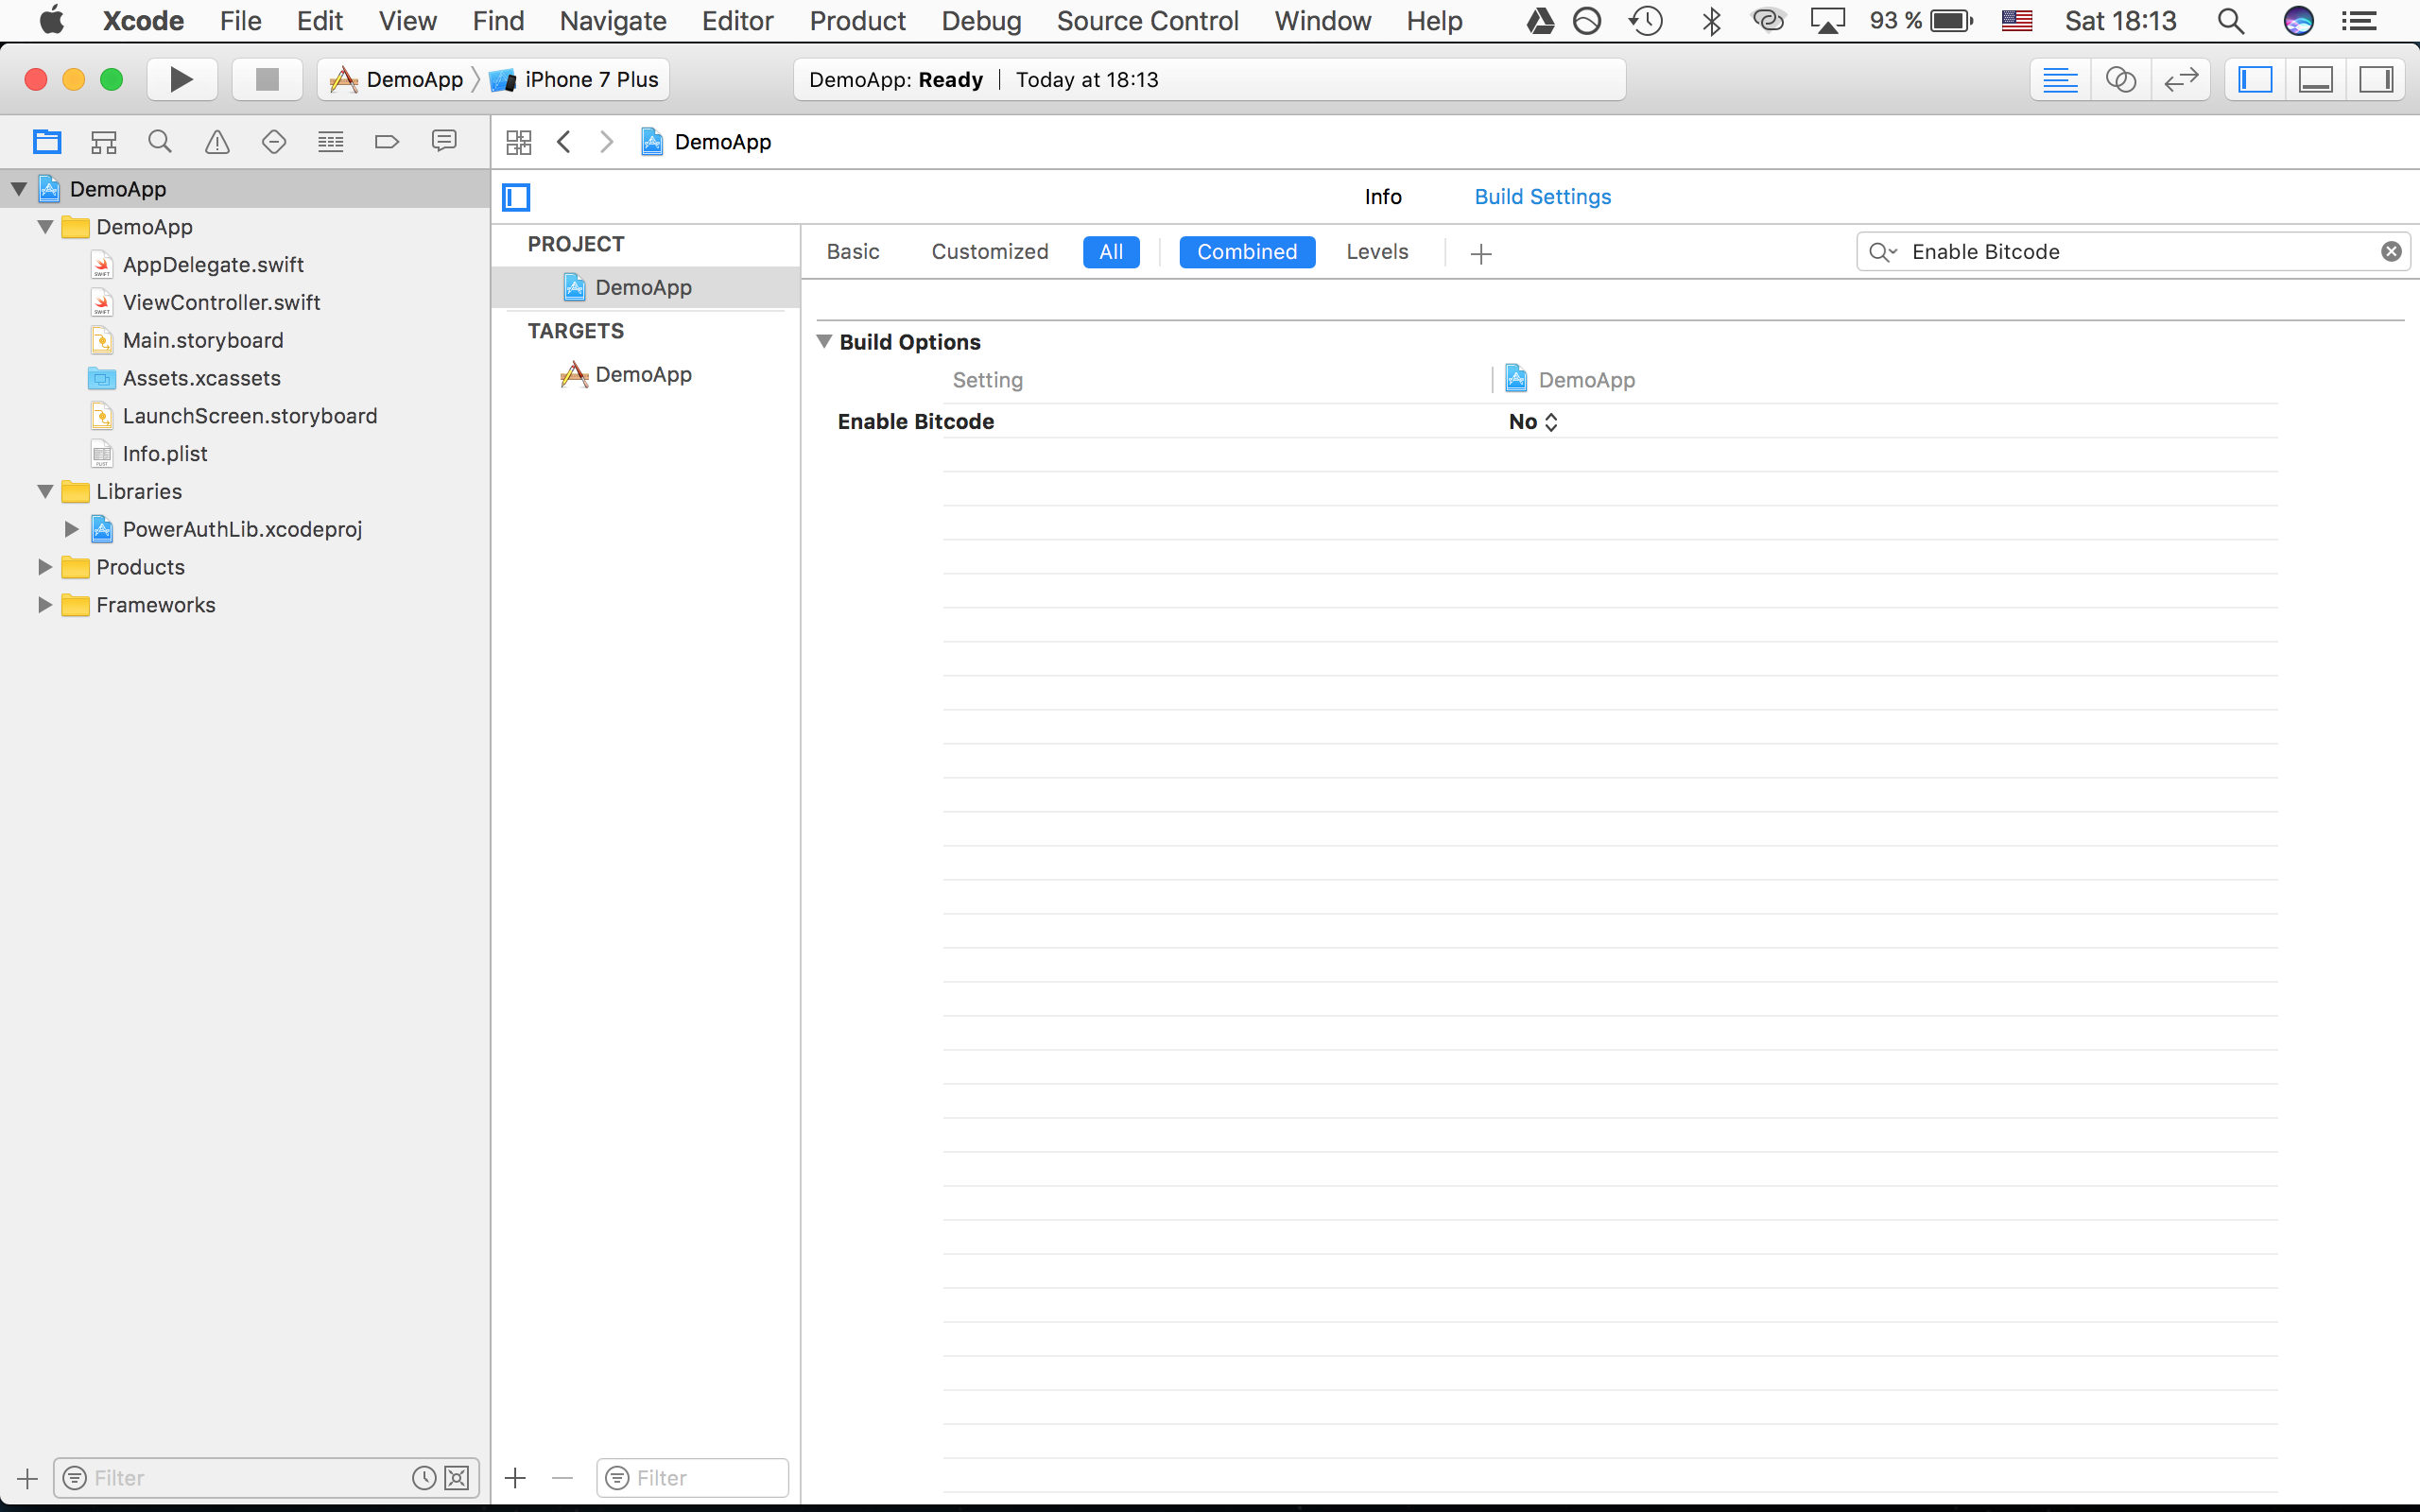
To disable Bitcode, go to your project Build Settings, search for Enable Bitcode option and set value to NO.
Include PowerAuth SDK in your sources
To use PowerAuth SDK, simply add following imports into your code:
// swift
import PowerAuth2
// Objective-C
#import <PowerAuth2/PowerAuth2.h>
From now on, you can use PowerAuthSDK and other classes in your project.
Configuration
In order to be able to configure your PowerAuthSDK instance, you need following values from the PowerAuth Server:
APP_KEY- Application key, that binds activation with specific application.APP_SECRET- Application secret, that binds activation with specific application.KEY_MASTER_SERVER_PUBLIC- Master Server Public Key, used for non-personalized encryption and server signature verification.
Also, you need to specify your instance ID (by default, this can be for example an app bundle ID). This is because one application may use more than one custom instances of PowerAuthSDK and identifier is the way to distinguish these instances while working with Keychain data.
Finally, you need to know the location of your PowerAuth Standard RESTful API endpoints. That path should contain everything that goes before the /pa/** prefix of the API endpoints.
To sum it up, in order to configure PowerAuthSDK default instance, add following code to your application delegate:
func application(_ application: UIApplication, didFinishLaunchingWithOptions launchOptions: [UIApplicationLaunchOptionsKey: Any]?) -> Bool {

    // Prepare the configuration
    let configuration = PowerAuthConfiguration()
    configuration.instanceId = Bundle.main.bundleIdentifier ?? ""
    configuration.appKey = "sbG8gd...MTIzNA=="
    configuration.appSecret = "aGVsbG...MTIzNA=="
    configuration.masterServerPublicKey = "MTIzNDU2Nz...jc4OTAxMg=="
    configuration.baseEndpointUrl = "https://localhost:8080/demo-server"

    // Configure default PowerAuthSDK instance
    PowerAuthSDK.initSharedInstance(configuration)

    return true
}
Activation
After you configure the SDK instance, you are ready to make your first activation.
Activation via Activation Code
The original activation method uses a one-time activation code generated in PowerAuth Server. To create an activation using this method, some external application (Internet banking, ATM application, branch / kiosk application) must generate an activation code for you and display it (as a text or in a QR code).
Use following code to create an activation once you have an activation code:
let deviceName = "Petr's iPhone 7" // or UIDevice.current.name
let activationCode = "VVVVV-VVVVV-VVVVV-VTFVA" // let user type or QR-scan this value

// Create a new activation with given device name and activation code
PowerAuthSDK.sharedInstance().createActivation(withName: deviceName, activationCode: activationCode) { (result, error) in

    if error == nil {
        // No error occurred, proceed to credentials entry (PIN prompt, Enable Touch ID switch, ...) and commit
        // The 'result' contains 'activationFingerprint' property, representing the device public key - it may be used as visual confirmation
    } else {
        // Error occurred, report it to the user
    }

}
Activation via Custom Credentials
You may also create an activation using any custom login data - it can be anything that server can use to obtain user ID to associate with a new activation. Since the credentials are custom, the server’s implementation must be able to process such request. Unlike the previous versions of SDK, the custom activation no longer requires a custom activation endpoint.
Use following code to create an activation using custom credentials:
// Create a new activation with given device name and custom login credentials
let deviceName = "Petr's iPhone 7" // or UIDevice.current.name
let credentials = [
    "username": "[email protected]",
    "password": "YBzBEM"
]

PowerAuthSDK.sharedInstance().createActivation(withName: deviceName, identityAttributes: credentials, extras: nil) { (result, error) in
    if error == nil {
        // No error occurred, proceed to credentials entry (PIN prompt, Enable Touch ID switch, ...) and commit
        // The 'result' contains 'activationFingerprint' property, representing the device public key - it may be used as visual confirmation
    } else {
        // Error occurred, report it to the user
    }
}
Note that by using weak identity attributes to create an activation, the resulting activation is confirming a “blurry identity”. This may greately limit the legal weight and usability of a signature. We recommend using a strong identity verification before an activation can actually be created.
Committing Activation Data
After you create an activation using one of the methods mentioned above, you need to commit the activation - to use provided user credentials to store the activation data on the device. Use following code to do this.
do {
    try PowerAuthSDK.sharedInstance().commitActivation(withPassword: "1234")
} catch _ {
    // happens only in case SDK was not configured or activation is not in state to be commited
}
This code has created activation with two factors: possession (key stored using a key derived from a device fingerprint) and knowledge (password, in our case a simple PIN code). If you would like to enable Touch or Face ID support at this moment, use following code instead of the one above:
do {
    let auth = PowerAuthAuthentication()
    auth.usePossession = true
    auth.usePassword   = "1234"
    auth.useBiometry   = true

    try PowerAuthSDK.sharedInstance().commitActivation(with: auth)
} catch _ {
    // happens only in case SDK was not configured or activation is not in state to be commited
}
Requesting Activation Status
To obtain a detailed activation status information, use following code:
// Check if there is some activation on the device
if PowerAuthSDK.sharedInstance().hasValidActivation() {

    // If there is an activation on the device, check the status with server
    PowerAuthSDK.sharedInstance().fetchActivationStatus() { (status, customObject, error) in

        // If no error occurred, process the status
        if error == nil {

            // Activation state: .created, .otp_Used, .blocked, .removed
            let state: PA2ActivationState = status.state

            // Failed login attempts, remaining = max - current
            let currentFailCount = status.failCount
            let maxAllowedFailCount = status.maxFailCount
            let remainingFailCount = maxAllowedFailCount - currentFailCount

            // Custom object contains any proprietary server specific data


        } else {
            // Network error occurred, report it to the user
        }

    }

} else {
    // No activation present on device
}
Note that the status fetch may fail at an unrecoverable error PA2ErrorCodeProtocolUpgrade, meaning that it’s not possible to upgrade PowerAuth protocol to a newer version. In this case, it’s recommended to remove the activation locally.
Data Signing
The main feature of PowerAuth protocol is data signing. PowerAuth has three types of signatures:
- Symmetric Multi-Factor Signature: Suitable for most operations, such as login, new payment or confirming changes in settings.
- Asymmetric Private Key Signarture: Suitable for documents, where strong one sided signature is desired.
- Symmetric Offline Multi-Factor Signature: Suitable for very secure operations, where the signature is validated over the out-of-band channel.
- Verify server signed data: Suitable for receiving arbitrary data from the server.
Symmetric Multi-Factor Signature
To sign request data, you need to first obtain user credentials (password, PIN code, Touch ID scan) from the user. The task of obtaining the user credentials is used in more use-cases covered by the SDK. The core class is PowerAuthAuthentication, that holds information about used authentication factors:
// 2FA signature, uses device related key and user PIN code
let auth = PowerAuthAuthentication()
auth.usePossession = true
auth.usePassword   = "1234"
auth.useBiometry   = false
When signing POST, PUT or DELETE requests, use request body bytes (UTF-8) as request data and following code:
// 2FA signature, uses device related key and user PIN code
let auth = PowerAuthAuthentication()
auth.usePossession = true
auth.usePassword   = "1234"
auth.useBiometry   = false

// Sign POST call with provided data made to URI with custom identifier "/payment/create"
do {
    let signature = try PowerAuthSDK.sharedInstance().requestSignature(with: auth, method: "POST", uriId: "/payment/create", body: requestBodyData)
    let httpHeaderKey = signature.key
    let httpHeaderValue = signature.value
} catch _ {
    // In case of invalid configuration, invalid activation state or corrupted state data
}
When signing GET requests, use the same code as above with normalized request data as described in specification, or (preferrably) use the following helper method:
// 2FA signature, uses device related key and user PIN code
let auth = PowerAuthAuthentication()
auth.usePossession = true
auth.usePassword   = "1234"
auth.useBiometry   = false

// Sign GET call with provided query parameters made to URI with custom identifier "/payment/create"
let params = [
    "param1": "value1",
    "param2": "value2"
]

do {
    let signature = try PowerAuthSDK.sharedInstance().requestGetSignature(with: auth, uriId: "/payment/create", params: params)
    let httpHeaderKey = signature.key
    let httpHeaderValue = signature.value
} catch _ {
    // In case of invalid configuration, invalid activation state or corrupted state data
}
Asymmetric Private Key Signature
Asymmetric Private Key Signature uses a private key stored in the PowerAuth secure vault. In order to unlock the secure vault and retrieve the private key, user has to be first authenticated using a symmetric multi-factor signature with at least two factors. This mechanism protects the private key on the device - server plays a role of a “doorkeeper” and holds the vault unlock key.
This process is completely transparent on the SDK level. To compute an asymmetric private key signature, request user credentials (password, PIN) and use following code:
// 2FA signature, uses device related key and user PIN code
let auth = PowerAuthAuthentication()
auth.usePossession = true
auth.usePassword   = "1234"
auth.useBiometry   = false

// Unlock the secure vault, fetch the private key and perform data signing
PowerAuthSDK.sharedInstance().signData(withDevicePrivateKey: auth, data: data) { (signature, error) in
    if error == nil {
        // Send data and signature to the server
    } else {
        // Authentication or network error
    }
}
Symmetric Offline Multi-Factor Signature
This type of signature is very similar to Symmetric Multi-Factor Signature but the result is provided in form of simple, human readable string (unlike the online version, where the result is HTTP header). To calculate the signature you need a typical PowerAuthAuthentication object to define all required factors, nonce and data to sign. The nonce and data should be also transmitted to the application over the OOB channel (for example by scanning a QR code). Then the signature calculation is straightforward:
// 2FA signature, uses device related key and user PIN code
let auth = PowerAuthAuthentication()
auth.usePossession = true
auth.usePassword   = "1234"
auth.useBiometry   = false

do {
    let signature = try PowerAuthSDK.sharedInstance().offlineSignature(with: auth, uriId: "/confirm/offline/operation", body: data, nonce: nonce)
    print("Signature is " + signature)
} catch _ {
    // In case of invalid configuration, invalid activation state or other error
}
Now the application has to show that calculated signature to the user and user has to re-type that code into the web application for the verification.
Verify server signed data
This task is useful when you need to receive an arbitrary data from the server and you need to be sure that data has has been issued by the server. The PowerAuthSDK is providing a high level method for validating data and associated signature:
// Validate data signed with the master server key
if PowerAuthSDK.sharedInstance().verifyServerSignedData(data, signature: signature, masterKey: true) {
    // data is signed with server's private master key
}
// Validate data signed with the personalized server key
if PowerAuthSDK.sharedInstance().verifyServerSignedData(data, signature: signature, masterKey: false) {
    // data is signed with server's private key
}
Password Change
Since the device does not know the password and is unable to verify the password without the help of the server side, you need to first call an endpoint that verifies a signature computed with the password. SDK offers two ways to do that.
The safe, but typically slower way is to use following code:
// Change password from "oldPassword" to "newPassword".
PowerAuthSDK.sharedInstance().changePassword(from: "oldPassword", to: "newPassword") { (error) in
    if error == nil {
        // Password was changed
    } else {
        // Error occurred
    }
}
This method calls /pa/v3/signature/validate under the hood with a 2FA signature with provided original password to verify the password correctness.
However, using this method does not usually fit to the typical UI workflow of a password change. The method may be used in cases where old password and new password are on a single screen, and therefore are both available at the same time. In most mobile apps, however, user first visits a screen to enter an old password and then (if the password is OK), the user proceeds to the two-screen flow of a new password setup (select password, confirm password). In other words, the workflow works like this:
- Show a screen to enter old password.
- Check old password on the server.
- If the old password is OK, then let user chose and confirm a new one.
- Change the password by “recrypting” the activation data.
For this purpose, you can use following code:
// Ask for old password
let oldPassword = "1234"

// Validate password on the server
PowerAuthSDK.sharedInstance().validatePasswordCorrect(oldPassword) { (error) in
    if error == nil {
        // Proceed to the new password setup
    } else {
        // Retry entering an old password
    }
}

// ...

// Ask for new password
let newPassword = "2468"

// Change the password locally
PowerAuthSDK.sharedInstance().unsafeChangePassword(from: oldPassword, to: newPassword)
Now, beware! Since the device does not know the actual old password, you need to make sure that the old password is validated before you use it in unsafeChangePassword. In case you provide a wrong old password, it will be used to decrypt the original data and these data will be encrypted using a new password. As a result, the activation data will be broken and irreversibly lost.
Biometry Setup
PowerAuth SDK for iOS provides an abstraction on top of the base Touch and Face ID support. While the authentication / data signing itself is nicely and transparently embedded in PowerAuthAuthentication object used in regular request signing, other biometry related processes require their own API.
Check Biometry Status
You have to check for biometry on three levels:
- System Availability:
- If Touch ID is present on the system and if iOS version is 9+
- If Face ID is present on the system and if iOS version is 11+
- Activation Availability: If biometry factor data are available for given activation.
- Application Availability: If user decided to use Touch ID for given app. (optional)
PowerAuth SDK for iOS provides code for first two of these checks.
To check if you can use biometry on the system, use following code from PA2Keychain class:
// Is biometry available and is enrolled on the system?
let canUseBiometry = PA2Keychain.canUseBiometricAuthentication

// Or alternative, to get supported biometry type
let supportedBiometry = PA2Keychain.supportedBiometricAuthentication
switch supportedBiometry {
    case .touchID: print("You can use Touch ID")
    case .faceID: print("You can use Face ID")
    case .none: print("Biometry is not supported or not enrolled")
}

// Or more complex, with full information about type and current status
let biometryInfo = PA2Keychain.biometricAuthenticationInfo
switch biometryInfo.biometryType {
    case .touchID: print("Touch ID is available on device.")
    case .faceID: print("Face ID is available on device.")
    case .none: print("Biometry is not supported.")
}
switch biometryInfo.currentStatus {
    case .notSupported: print("Biometry is not supported.")
    case .notAvailable: print("Biometry is not available at this moment.")
    case .notEnrolled: print("Biometry is supported, but not enrolled.")
    case .lockout: print("Biometry is supported, but it has been locked out.")
    case .available: print("Biometry is available right now.")
}
To check if given activation has biometry factor related data available, use following code:
// Does activation have biometric factor related data in place?
let hasBiometryFactor = PowerAuthSDK.sharedInstance().hasBiometryFactor()
The last check is fully under your control. By keeping the biometry settings flag, for example a BOOL in NSUserDefaults, you are able to show expected user Touch or Face ID status (in disabled state, though) even in the case biometry is not enabled or when no finger or face is enrolled on the device.
Enable Biometry
In case an activation does not yet have biometry related factor data and you would like to enable Touch or Face ID support, device must first retrieve the original private key from the secure vault for the purpose of key derivation. As a result, you have to use successful 2FA with password to enable biometry support.
Use following code to enable biometric authentication:
// Establish biometric data using provided password
PowerAuthSDK.sharedInstance().addBiometryFactor("1234") { (error) in
    if error == nil {
        // Everything went OK, Touch ID is ready to be used
    } else {
        // Error occurred, report it to user
    }
}
Disable Biometry
You can remove biometry related factor data used by Touch or Face ID support by simply removing the related key locally, using this one-liner:
// Remove biometric data
PowerAuthSDK.sharedInstance().removeBiometryFactor()
Activation Removal
You can remove activation using several ways - the choice depends on a desired behavior.
Simple Device-Only Removal
You can clear activation data anytime from Keychain. The benefit of this method is that it does not require help from server and user does not have to be logged in. The issue with this removal method is simple: The activation still remains active on the server side. This, however, does not have to be an issue in your case.
To remove only data related to PowerAuth SDK for iOS, use PA2Keychain class:
PowerAuthSDK.sharedInstance().removeActivationLocal()
Removal via Authenticated Session
In case your server uses an authenticated session for keeping user logged in, you can combine the previous method with calling your proprietary endpoint that removes activation for currently logged in user. The advantage of this method is that activation does not remain active on the server. The issue is that user has to be logged in (the session must be active and must have activation ID stored) and that you have to publish your own method for the purpose of this use case.
The code for this activation removal method is as follows:
// Use custom call to proprietary server endpoint to remove activation.
// User must be logged in at this moment, so that session can find
// associated activation ID
self.httpClient.post(null, "/custom/activation/remove") { (error) in
    if error == nil {
        PowerAuthSDK.sharedInstance().removeActivationLocal()
    } else {
        // Report error
    }
}
Removal via Signed Request
PowerAuth Standard RESTful API has a default endpoint /pa/v3/activation/remove for an activation removal. This endpoint uses a signature verification for looking up the activation to be removed. The benefit of this method is that it is already present in both PowerAuth SDK for iOS and PowerAuth Standard RESTful API - nothing has to be programmed. Also, user does not have to be logged in to use it. However, user has to authenticate using 2FA with either password or biometry.
Use following code for an activation removal using signed request:
// 2FA signature, uses device related key and user PIN code
let auth = PowerAuthAuthentication()
auth.usePossession = true
auth.usePassword   = "1234"
auth.useBiometry   = false

// Remove activation using provided authentication object
PowerAuthSDK.sharedInstance().removeActivation(with: auth) { (error) in
    if error == nil {
        // OK, activation was removed
    } else {
        // Report error to user
    }
}
End-To-End Encryption
Currently, PowerAuth SDK supports two basic modes of end-to-end encryption, based on ECIES scheme:
- In “application” scope, the encryptor can be acquired and used during the whole lifetime of the application. We used to call this mode as “non-personalized encryption” in the previous versions of SDK.
- In “activation” scope, the encryptor can be acquired only if
PowerAuthSDKhas a valid activation. The encryptor created for this mode is cryptographically bound to the parameters, agreed during the activation process. You can combine this encryption with PowerAuth Symmetric Multi-Factor Signature, in “sign-then-encrypt” mode.
For both scenarios, you need to acquire PA2ECIESEncryptor object, which will then provide interface for the request encryption and the response decryption. The object currently provides only low level encryption and decryption methods, so you need to implement your own JSON (de)serialization and request and response processing.
Following steps are typically required for a full E2EE request and response processing:
- Acquire the right encryptor from
PowerAuthSDKinstance. For example:// Encryptor for "application" scope. guard let encryptor = powerAuthSDK.eciesEncryptorForApplicationScope() else { ...failure... } // ...or similar, for an "activation" scope. guard let encryptor = powerAuthSDK.eciesEncryptorForActivationScope() else { ...failure... } -
Serialize your request payload, if needed, into sequence of bytes. This step typically means that you need to serialize your model object into JSON formatted sequence of bytes.
- Encrypt your payload:
guard let cryptogram = encryptor.encryptRequest(payloadData) else { ...failure... } - Construct a JSON from provided cryptogram object. The dictionary with following keys is expected:
ephemeralPublicKeyproperty fill withcryptogram.keyBase64encryptedDataproperty fill withcryptogram.bodyBase64macproperty fill withcryptogram.macBase64
So, the final request JSON should looks like:
{ "ephemeralPublicKey" : "BASE64-DATA-BLOB", "encryptedData": "BASE64-DATA-BLOB", "mac" : "BASE64-DATA-BLOB" } - Add following HTTP header (for signed requests, see note below):
// Acquire a "metadata" object, which contains an additional information for the request construction
guard let metadata = encryptor.associatedMetaData else { ...should never happen... }
let httpHeaderName = metadata.httpHeaderKey
let httpHeaderValue = metadata.httpHeaderValue
Note, that if “activation” scoped encryptor is combined with PowerAuth Symmetric Multi-Factor signature, then this step is not required. The signature’s header already contains all information required for proper request decryption on the server.
- Fire your HTTP request and wait for a response
- In case that non-200 HTTP status code is received, then the error processing is identical to a standard RESTful response, defined in our protocol. So, you can expect JSON object with
"error"and"message"properties in the response.
- In case that non-200 HTTP status code is received, then the error processing is identical to a standard RESTful response, defined in our protocol. So, you can expect JSON object with
- Decrypt the response. The received JSON typically looks like:
{
   "encryptedData": "BASE64-DATA-BLOB",
   "mac" : "BASE64-DATA-BLOB"
}
So, you need to create yet another “cryptogram” object, but with only two properties set:
let responseCryptogram = PA2ECIESCryptogram() responseCryptogram.bodyBase64 = response.getEncryptedData() responseCryptogram.macBase64 = response.getMac() guard let responseData = encryptor.decryptResponse(responseCryptogram) else { ... failed to decrypt data ... } - And finally, you can process your received response.
As you can see, the E2EE is quite non-trivial task. We recommend you to contact us before you even consider to use an application-specific E2EE. We can provide you more support on per-scenario basis, especially if we understand first, what you need to achieve with end-to-end encryption in your application.
Secure Vault
PowerAuth SDK for iOS has a basic support for an encrypted secure vault. At this moment, the only supported method allows application to establish an encryption / decryption key with given index. Index represents a “key number” - your identifier for given key. Different business logic purposes should have encryption keys with different index value.
On a server side, all secure vault related work is concentrated in a /pa/v3/vault/unlock endpoint of PowerAuth Standard RESTful API. In order to receive data from this response, call must be authenticated with at least 2FA (using password or PIN).
Obtaining Encryption Key
In order to obtain an encryption key with given index, use following code:
// 2FA signature, uses device related key and user PIN code
let auth = PowerAuthAuthentication()
auth.usePossession = true
auth.usePassword   = "1234"
auth.useBiometry   = false

// Select custom key index
let index = UInt64(1000)

// Fetch encryption key with given index
PowerAuthSDK.sharedInstance().fetchEncryptionKey(auth, index: index) { (encryptionKey, error) in
    if error == nil {
        // ... use encryption key to encrypt or decrypt data
    } else {
        // Report error
    }
}
Token Based Authentication
WARNING: Before you start using access tokens, please visit our wiki page for powerauth-crypto for more information about this feature.
The tokens are simple, locally cached objects, producing timestamp-based authorization headers. Be aware that tokens are NOT a replacement for general PowerAuth signatures, but are helpful in situations, when the signatures are too heavy or too complicated for implementation. Each token has following properties:
- It needs PowerAuth signature for its creation (e.g. you need to provide
PowerAuthAuthenticationobject) - It has unique identifier on the server. This identifier is not exposed to the public API, but DEBUG version of SDK can reveal that identifier in the debugger (e.g. you can use
po tokenObjectto print object’s description) - It has symbolic name (e.g. “MyToken”) defined by the application programmer to identify already created tokens.
- It can generate timestamp based authorization HTTP headers.
- Can be used concurrently. Token’s private data doesn’t change in time.
- The token is associated with the
PowerAuthSDKinstance. So, you can use the same symbolic name in multiple SDK instances and each created token will be unique. - Tokens are persisted in the keychain and cached in the memory.
- Once the parent
PowerAuthSDKinstance loose its activation, then all its tokens are removed from the local database.
Getting token
To get an access token, you can use following code:
// 1FA signature, uses device related key
let auth = PowerAuthAuthentication()
auth.usePossession = true

let tokenStore = PowerAuthSDK.sharedInstance().tokenStore

let task = tokenStore.requestAccessToken(withName: "MyToken", authentication: auth) { (token, error) in
    if let token = token {
        // now you can generate header
    } else {
        // handle error
    }
}
The request is performed synchronously or asynchronously depending on whether the token is locally cached on the device. You can test this situation by calling tokenStore.hasLocalToken(withName: "MyToken"). If operation is asynchronous, then requestAccessToken() returns cancellable task. Be aware that you should not issue multiple asynchronous operations for the same token name. Here’s a more complex example:
private var tokenAcquireTask: Any?
private var tokenAcquireRequests: [(PowerAuthToken?, Error?)->Void] = []

func acquireToken(_ completion: @escaping (PowerAuthToken?, Error?)->Void) {
    let tokenStore = PowerAuthSDK.sharedInstance().tokenStore
    if let token = tokenStore.localToken(withName: "MyToken") {
        // token is available in local db
        completion(token, nil)
        return
    }
    // token is not locally available, remember that completion block
    tokenAcquireRequests.append(completion)
    if tokenAcquireTask == nil {
        // there's no pending request, create a new one
        let auth = PowerAuthAuthentication()
        auth.usePossession = true
        // now try to request for token
        tokenAcquireTask = tokenStore.requestAccessToken(withName: "MyToken", authentication: auth) { (token, error) in
            // we have result, report to all blocks
            self.tokenAcquireTask = nil
            self.tokenAcquireRequests.forEach { (block) in
                block(token, error)
            }
            self.tokenAcquireRequests.removeAll()
        }
    }
}
The complex example above is trying to hide that problematic asynchronous requesting with remembering completion blocks when the underlying HTTP request is already on the fly. Be aware that the code is still very simple PoC and for example, doesn’t solve cancelation and thread safety.
Generating authorization header
Once you have a PowerAuthToken object, use following code to generate an authorization header:
if let header = token.generateHeader() {
    let httpHeader = [ header.key : header.value ]
    // now you can attach that httpHeader to your HTTP request
} else {
    // in case of nil, token is no longer valid
}
Removing token from server
To remove token from the server, you can use following code:
let tokenStore = PowerAuthSDK.sharedInstance().tokenStore
tokenStore.removeAccessToken(withName: "MyToken") { (removed, error) in
    if removed {
        // token has been removed
    } else {
        // handle error
    }
}
Removing token locally
To remove token locally, you can simply use following code:
let tokenStore = PowerAuthSDK.sharedInstance().tokenStore
// Remove just one token
tokenStore.removeLocalToken(withName: "MyToken")
// Remove all local tokens
tokenStore.removeAllLocalTokens()
Note that removing tokens locally you’ll loose control about tokens stored on the server.
Apple Watch Support
This part of the documentation describes how to add support for Apple Watch into your PowerAuth powered IOS application.
Prepare Watch Connectivity
The PowerAuth SDK for iOS is using WatchConnectivity framework to achieve data synchronization between iPhone and Apple Watch devices. If you’re not familiar with this framework, then please take a look at least at WCSession and WCSessionDelegate interfaces, before you start.
The PowerAuth SDK doesn’t manage state of WCSession and doesn’t set delegate to the session’s singleton instance. It’s up to you to properly configure and activate default session, but the application has to cooperate with PowerAuth SDK to process the messages received from the counterpart device. To do this, PowerAuth SDKs on both sides are providing PA2WCSessionManager class which can help you process all incoming messages. Here’s an example, how you can implement simple SessionManager for IOS:
import Foundation
import WatchConnectivity
import PowerAuth2

class SessionManager: NSObject, WCSessionDelegate {

    static let shared = SessionManager()

    private let session: WCSession? = WCSession.isSupported() ? WCSession.default : nil

    // Returns false, when session is not available on the device.
    func activateSession() -> Bool {
        session?.delegate = self
        session?.activate()
        return session != nil
    }

    // MARK: - WCSessionDelegate

    func session(_ session: WCSession, activationDidCompleteWith activationState: WCSessionActivationState, error: Error?) {
        if activationState == .activated {
            // now you can use WCSession for communication, send status of session to watch, etc...
        }
    }

    func sessionDidBecomeInactive(_ session: WCSession) {
        // session is now inactive
    }

    func sessionDidDeactivate(_ session: WCSession) {
        // session is now deactivated
    }

    func session(_ session: WCSession, didReceiveMessageData messageData: Data) {
        // Try to process PowerAuth messages...
        if PA2WCSessionManager.sharedInstance.processReceivedMessageData(messageData, replyHandler: nil) {
            return // processed...
        }
        // Other SDKs, or your own messages can be handler here...
        print("SessionManager.didReceiveMessageData did not process message.")
    }

    func session(_ session: WCSession, didReceiveMessageData messageData: Data, replyHandler: @escaping (Data) -> Void) {
        // Try to process PowerAuth messages...
        if PA2WCSessionManager.sharedInstance.processReceivedMessageData(messageData, replyHandler: replyHandler) {
            return // processed...
        }
        // Other SDKs, or your own messages can be handler here...
        print("SessionManager.didReceiveMessageData did not process message. Responding with empty data")
        replyHandler(Data())
    }

    func session(_ session: WCSession, didReceiveUserInfo userInfo: [String : Any] = [:]) {
        // Try to process PowerAuth messages...
        if PA2WCSessionManager.sharedInstance.processReceivedUserInfo(userInfo) {
            return // processed...
        }
        // Other SDKs, or your own messages can be handler here...
        print("SessionManager.didReceiveUserInfo did not process message.")
    }
}
Note that the code above is very similar to its watchOS counterpart
The example is implementing only a minimum set of methods from WCSessionDelegate protocol to make message passing work. The important is, that at some point, your both (iOS & watchOS) applications has to call SessionManager.shared.activateSession() to make transfers possible. Once you activate your session on the device, then you can use all APIs related to the communication.
WCSession activation sequence
In this chapter we will discuss right initialization sequence for various interoperating objects during your application’s startup. It’s recommended to follow those rules to make communication between iOS & watchOS reliable.
tl;dr
On the application’s startup:
- Instantiate and configure all
PowerAuthSDKinstances and especially ones to be synchronized with Apple Watch. - Activate
WCSession, so get the default instance, assign your delegate and callactivate() - Wait for session’s activation in your delegate
- Now you can use watch related methods from PowerAuth SDK for iOS. For example, you can use lazy method to send status of activation to the watch device.
Implementation details
Due to our internal implementation details, each PowerAuthSDK instance is registered to PA2WCSessionManager for incoming message processing. The registration is done in object’s designated init method and the de-registration is automatic, after the SDK object is destroyed. This technique works great, but depends on existence of right object at the right time.
So, once you activate WCSession, your WCSessionDelegate is going to get messages (on the background thread), received from the counterpart watch device. The reason why we’re highlighting importance of right activation sequence is fact, that your watchOS application can wake up its iOS counterpart, so it’s highly possible, that some messages will be available right at the application’s startup. If you don’t follow our rules and you’ll not prepare your PowerAuthSDK instances before the WCSession is activated, then a couple of messages may be lost.
Fortunately, the situation on watchOS side is much easier, because all incoming messages are processed in one special service class, which is always available.
Sending Activation Status to Watch
Before you start using PowerAuth on watchOS, it’s recommended to send information about PowerAuth activation from iPhone to Apple Watch. The information transmitted to the watch is very limited. In fact, on watchOS side, you can check only whether the activation on iPhone is locally present or not. It is recommended to keep this status up to date as much as possible. That typically means that you may send status every time you complete or remove the activation.
To send current status of the activation, use following code:
if !PowerAuthSDK.sharedInstance().sendActivationStatusToWatch() {
    // send message has not been issued, WCSession is probably not available / active
} else {
    // message has been issued and it's guaranteed that it will be delivered to watch
}
There’s also asynchronous version, but watch device has to be reachable at the time of the call:
PowerAuthSDK.sharedInstance().sendActivationStatusToWatch { (error) in
    if let error = error {
        // handle error, otherwise the transfer was OK
    }
}
Note that sending status of PowerAuthSDK instance which is currently without activation also effectively remove all associated tokens from Apple Watch.
Sending Token to Watch
Once you have a PowerAuthToken object, use following code to send it to the Apple Watch:
if let token = tokenStore.localToken(withName: "MyToken") {
    if !token.sendToWatch() {
        // send message has not been issued, WCSession is probably not available / active
    } else {
        // message has been issued and it's guaranteed that it will be delivered to watch
    }
}
You can also use a different variant of the method with a completion block, but you have to be sure, that the Apple Watch is reachable at the time of call, otherwise the error is returned:
if let token = tokenStore.localToken(withName: "MyToken") {
    token.sendToWatch { (error) in
        if let error = error {
            // handle error, otherwise the transfer was OK
        }
    }
}
Removing Token from Watch
You can remotely remove token from paired Apple Watch:
if let token = tokenStore.localToken(withName: "MyToken") {
    if !token.removeFromWatch() {
        // send message has not been issued, WCSession is probably not available / active
    } else {
        // message has been issued and it's guaranteed that it will be delivered to watch
    }
}
There’s also asynchronous version, but paired watch has to be reachable at the time of the call:
if let token = tokenStore.localToken(withName: "MyToken") {
    token.removeFromWatch { (error) in
        if let error = error {
            // handle error, otherwise the transfer was OK
        }
    }
}
Common SDK Tasks
Error Handling
Most of the SDK methods return error object of an NSError class in case something goes wrong. Of course, it is your responsibility to handle errors these objects represent. There are two ways how you can obtain an error object from PowerAuth SDK for iOS.
In most cases, you receive an error object via a callback, like in this example:
PowerAuthSDK.sharedInstance().fetchActivationStatus { (status, customObject, error) in
    // Handle 'error' here
}
In other cases, you receive error via an exception, like in this example:
do {
    try PowerAuthSDK.sharedInstance().commitActivation(withPassword: "1234")
} catch let error as NSError {
    // Handle 'error' here
}
Note: The original Objective-C code uses method with BOOL return type that passes NSError** (pointer to error object) as a method parameter. This syntax is automatically converted to exceptions when using code in Swift.
Errors that are caused by PowerAuth SDK for iOS use PA2ErrorDomain and one of the codes listed in PA2ErrorConstants.h file. Use these values to determine the type of an error. In principle, all errors should be in principle handled in a very similar manner. Use this code snippet for an inspiration:
if error == nil {
    // No error happened
} else {
    // Handle the error
    if let error = error as? NSError {

        // Is this a PowerAuth SDK for iOS error?
        if error.domain == PA2ErrorDomain {

            // If yes, handle the error based on the error code
            switch (error.code) {

            case PA2ErrorCodeNetworkError:
                print("Error code for error with network connectivity or download")

            case PA2ErrorCodeSignatureError:
                print("Error code for error in signature calculation")

            case PA2ErrorCodeInvalidActivationState:
                print("Error code for error that occurs when activation state is invalid")

            case PA2ErrorCodeInvalidActivationData:
                print("Error code for error that occurs when activation data is invalid")

            case PA2ErrorCodeMissingActivation:
                print("Error code for error that occurs when activation is required but missing")

            case PA2ErrorCodeAuthenticationFailed:
                print("Error code for error that occurs when authentication using PowerAuth signature fails")

            case PA2ErrorCodeActivationPending:
                print("Error code for error that occurs when pending activation is present and work with completed activation is required")

            case PA2ErrorCodeKeychain:
                print("Error code for keychanin related errors")

            case PA2ErrorCodeBiometryNotAvailable:
                print("Error code for TouchID/FaceID not available error")

            case PA2ErrorCodeBiometryCancel:
                print("Error code for TouchID/FaceID action cancel error")

            case PA2ErrorCodeOperationCancelled:
                print("Error code for cancelled operations")

            case PA2ErrorCodeEncryption:
                print("Error code for errors related to end-to-end encryption")

            case PA2ErrorCodeInvalidToken:
                print("Error code for errors related to token based auth.")

            case PA2ErrorCodeWatchConnectivity:
                print("Error code for errors related to synchronization between ios and watchos.")

            case PA2ErrorCodeProtocolUpgrade:
                print("Error code for error that occurs when protocol upgrade fails at unrecoverable error.")

            case PA2ErrorCodePendingProtocolUpgrade:
                print("The operation is temporarily unavaiable, due to pending protocol upgrade.")

            default:
                print("Unknown error")
            }
        }
    }
}
Note that you typically don’t need to handle all error codes reported in Error object, or report all that situations to the user. Most of the codes are informational and helps the developers properly integrate SDK to the application. The good example is PA2ErrorCodeInvalidActivationState, which typically means that your application’s logic is broken and you’re using PowerAuthSDK in an unexpected way.
Here’s the list of an important error codes, which should be properly handled by the application:
PA2ErrorCodeBiometryCancelis reported when user cancels biometric authentication dialogPA2ErrorCodeProtocolUpgradeis reported when SDK failed to upgrade itself to a newer protocol version. The code may be reported fromPowerAuthSDK.fetchActivationStatus(). This is an unrecoverable error resulting to the broken activation on the device, so the best situation is to inform the user about the situation and remove the activation locally.PA2ErrorCodePendingProtocolUpgradeis reported when the requested SDK operation cannot be completed due to pending PowerAuth protocol upgrade. You can retry the operation later. The code is typically reported in the situations, when SDK is performing protocol upgrade on the background (as a part of activation status fetch) and the application want’s to calculate PowerAuth signature in parallel operation. Such kind of concurrency is forbidden since SDK version1.0.0
Working with Invalid SSL Certificates
Sometimes, you may need to develop or test you application against a service that runs over HTTPS protocol with invalid (self-signed) SSL certificate. By default, HTTP client used in PowerAuth SDK communication validates certificate. To disable the certificate validation, add following code just before your PowerAuthSDK instance configuration:
// Set `PA2ClientSslNoValidationStrategy as the defauld client SSL certificate validation strategy`
PA2ClientConfiguration.sharedInstance().sslValidationStrategy = PA2ClientSslNoValidationStrategy()
Note that since SDK version 0.18.0, changing PA2ClientConfiguration no longer affects networking for previously instantiated PowerAuthSDK objects.
Additional Features
PowerAuth SDK for iOS contains multiple additional security features that are useful for mobile apps.
Root Detection
You can easily detect if the device is jailbroken using following code:
// Check if the device is jailbroken using best effort attempt
let isJailbroken = PA2System.isJailbroken()
In case you would like to rely on a slightly more secure inline C code, use this way to perform the check:
// Check if the device is jailbroken using best effort attempt
let isJailbroken = pa_isJailbroken()
Password Strength Indicator
Whenever user selects a password, you may estimate the password strength using following code:
// Determine the password strength: INVALID, WEAK, NORMAL, STRONG
let strength: PasswordStrength = PA2PasswordUtil.evaluateStrength("1234", passwordType: .PIN)
Passwords that are INVALID should block the progress. You should translate WEAK passwords to UI warnings (not blocking progress), NORMAL passwords to OK state, and STRONG passwords to rewarding UI message (so that we appreciate user selected strong password, without pushing the user to selecting strong password too hard).
Of course, you may apply any additional measures for the password validity and strength on top of the logics we provide.
Debug build detection
It is sometimes useful to switch PowerAuth SDK to a DEBUG build configuration, to get more logs from the library:
- CocoaPods: a majority of the SDK is distributed as source codes, so it will match your application’s build configuration. Only a low level C++ codes and several wrapper classes on top of those are precompiled into static library.
- Manual installation: Xcode is matching build configuration across all nested projects, so you usually don’t need to care about the configuration switching.
The DEBUG build is usually helpful during the application development, but on other side, it’s highly unwanted in production applications. For this purpose, the PA2System.isInDebug() method provides an information, whether the PowerAuth library was compiled in DEBUG configuration. It is a good practice to check this flag and crash the process when the production application is linked against the DEBUG PowerAuth:
#if YOUR_APPSTORE_BUILD_FLAG
    // Final vs Debug library trap
    if PA2System.isInDebug() {
        fatalError("CRITICAL ERROR: You're using Debug PowerAuth library in production build.")
    }
#endif